
You know by now that although Elements does not have a layer mask as such you can use the Mask that is attached to any Adjustment Layer. This can be called an Elemask for short. To refresh your memory or to see how to do it if you have not seen this before please look at High Dynamic Range Photographs. Later version of Elements now have the facilty to add Layer Masks. So you can ignore this line.
The idea in this tutorial is to bring through delicate colours from the original on to a monochrome version. The delicacy amount is entirely up to you. That is colour to taste.
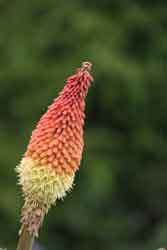
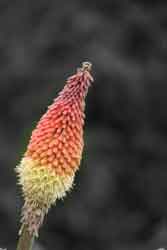
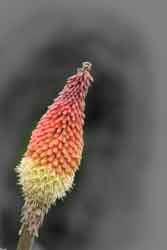
Here is an example of one possible way of using this idea. The left image is the original. The middle image is a possible final result but with a bit more tweaking the right image can be made using a second Elemask.
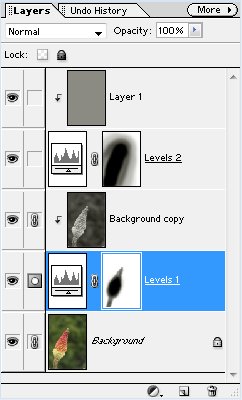
Here is the final layer stack.
The process is as follows:-
1. Open a suitable photograph. Portraits or flowers work well here.
2. Go to Layer in the top menu bar. Click on Duplicate Layer. Click on OK. It will be called Background Copy. You can rename it by double clicking on Background Copy. It is highlighted so just type in a new name.
3. Convert to Monochrome by Shift + Ctrl + U.
4. Now highlight the Background by clicking on the bottom layer.
5. Click on the Black & White Circle at the bottom of the Layer Palette to open the Adjustment Layer list.
6. Click on Levels Adjustment Layer. Without making any adjustments click on the OK button.
7. Now highlight the Background Copy by clicking on the top layer.
8. From the Layer menu from the top menu click on Group with Previous Create Clipping Stack. Short cut is Ctrl + G.
9. Click on the Layer Mask.
10. Press D on the keyboard to set the Foreground/Background to Black over White.
11. Select the Brush tool from the tool bar.
12. Adjust the Opacity on the panel below the workspace by pressing 1 on the keyboard to set to 10%. Adjust you brush size and hardness to suit.
13. Paint on the Mask using the Black paint. This will reveal the colour from the bottom layer very gradually. Build up the colour gently so that your brush strokes are not seen. If you overdo it then press the X key to reverse the Black/White and repaint.
14. Now for the tweaking. With the Background copy highlighted make a new empty layer by clicking on the New Layer Icon at the bottom of the Layers Palette.
15. We need to fill this with mid grey. Do this from the Colour Picker [click on the Foreground/Background icon on the Tool bar]. Set HSB to 0, 0 , 50% or RGB to 128, 128, 128. Click OK.
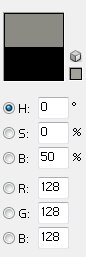
16. Fill this layer with Grey by pressing the Alt + Backspace keys if Grey is the top in the Foreground/Background icon on the Tool bar.
17. Select the Background Copy and Click on the Adjustment Layer icon. From the drop down list click on Levels. Again click on OK making no adjustments.
18. Now highlight the top layer. Press Ctrl + G to group this layer.
19. Click on the Layer Mask and repeat steps 10 to 13.
20. That is all for this idea but layer masks can be used for many other purposes too and in other ways..