Making Skies
Change the mood of a photo by giving it a striking new sky
You cannot always count on nature to give you the perfect clouds when you need them. There are times when you'll just have to grab your shot and give nature a helping hand with some Photoshop trickery - and add your own clouds. In this tutorial, we show you how to use and apply a Clouds Render and alter it to suit your purpose.
1. Create the clouds
-
First, go to File > New and select the Default Photoshop Elements Size preset.

- Set the Foreground and Background colours to Light and Dark sky blues.
- Use the Gradient tool set to Foreground to Background to draw a light blue to dark blue linear gradient.
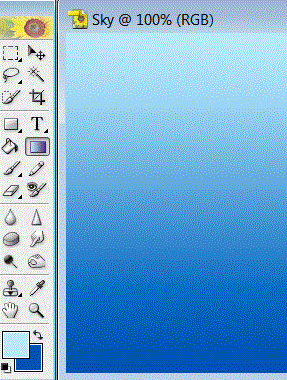
- Now, create a new layer; press D on the keyboard to reset the Fore and Background colours and choose Filter > Render > Clouds.
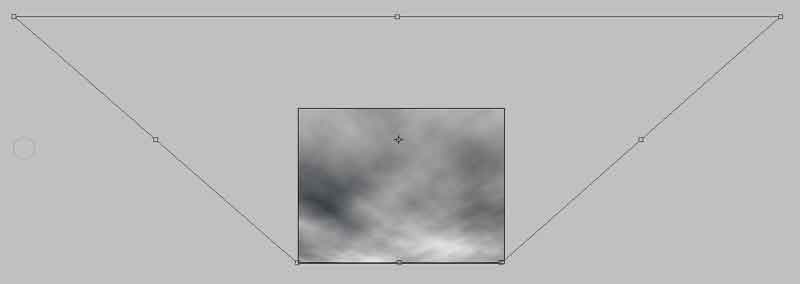
- To make your clouds recede into the distance, go to Image > Transform > Perspective.
- Drag the top corner handles outwards to stretch out the top of the Cloud layer.
- Right Click on the Clouds and pick Scale.
- Drag the top up to stretch further.
- Hit the Return key and press Ctrl + D [de-selecting] and you're finished.
2. Add an Elemask
-
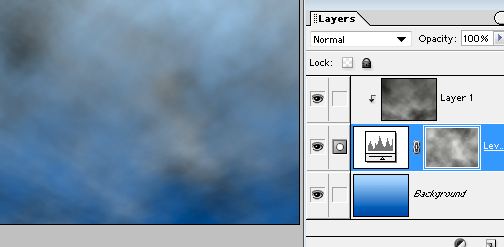
Click on Create Adjustment Layer and pick Levels from the drop-down menu.
- Click OK.
- Drag the Levels Adjustment Layer below the Cloud layer.
- While holding down the Alt key, move the cursor between the Cloud layer and Levels Adjustment Layer.
- Click when you see two overlapping circles appear.
- Apply a Cloud filter (as in step 1) to the Adjustment Layer's mask. This should be in shades of grey.
3. Colour the sky
-
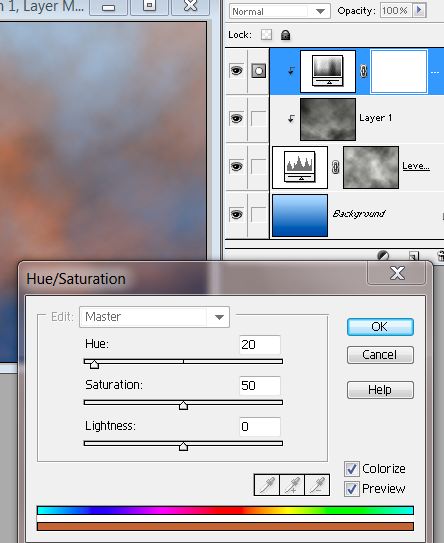
Click on the Cloud layer and create a Hue/Saturation Adjustment Layer.
- While holding down the Alt key, move the cursor between the Cloud layer and Hue/Saturation Adjustment Layer.
- Click when you see two overlapping circles appear
- Ensure the Colourise box is ticked.
- Double click on the H & S icon to re-open the Adjustment Layer.
- Drag the Hue slider to 20 to tint the midtones a sunset red.
- Move the Saturation slider up to 50 to boost the strength of the sunset.
- Click OK to apply the changes you've made.
4. Finishing touches
-
To create more realistic, ephemeral looking clouds, target the Cloud layer and choose Filter > Blur > Motion Blur.
- Set Blur Angle to -25 and Distance to 17 pixels.
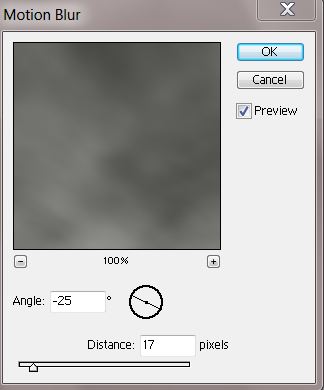
- Click OK.
- Use the Crop tool to remove any sharp lines at the lower edge of the frame.
- You can now save the image in TIFF and use the clouds to enhance your landscapes.
- By changing the Hue/Saturation Adjustment Layer you can alter the mood of your sky.
This idea was George Cairns of Photo Radar
To page 46
HOME
DIGITAL INDEX
