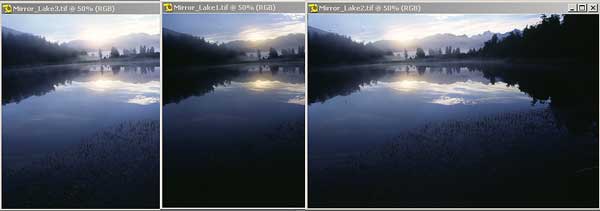
There are many times when taking a photo that parts of it are burnt out or are dark and dense. These areas have no details and can spoil an otherwise perfect picture. The way we used to overcome such defects was never satisfactory and compromises had to be made. Now with digital manipulation we can overcome all these problems and end up with a photo with detail in every nook and cranny.
There are programs made for this task such as Photomatix Pro and there is a high dynamic range system in Photoshop CS2 & 3. These programs are out of reach for most people and are hard to use as well. So here we shall explore what is possible on the simplest of image programs namely Photoshop Elements of all flavours.
The key to doing this is to take a series of photos of the same scene using a tripod preferably at differing exposures. Most cameras have an Automatic Exposure Bracketing system. This enables you to take 3 photos in quick succession and different exposures that you have pre-set. If your camera does not have this system then you can do this by using the manual mode and between each of 3 shots alter the aperture by 2 stops one higher and one lower than the indicated correct exposure.
The method of using these 3 photographs is as follows.
1. Open Elements and then open the 3 photos. Here we have 3 photos taken at dawn and the right image has the sun overexposed but the foreground alright more or less.
2. Use the Move tool to drag each photo onto one of the three in the usual way holding down the shift key to exactly centre each image. They will now be exactly aligned one on top of the other. Check this by changing the Opacity of first the top layer and then the second layer. Shift the images using the Move tool if needed. The Arrow keys can be used to move by one pixel at a time. Reset the Opacity to 100%. It is recommended that the lightest image is the top layer.
3. Save the new combination using Save As..
4. Now close the two images down that you have placed on top.
5. Now that we have got Grants tools we can add a Layer Mask to the top two layers. If you do not have these tools then you can simulate it fairly easily as follows.
5a. The ELEMASK [from myjanee.com].
5b. To make a layer mask for layer 2 click on the background layer.
5c. Click on the Adjustment layer icon and select any layer.
5d. Do not change anything on this layer just click the OK button.
5e. Highlight Layer 1 and the go to Layer in Menu bar and click on Group with previous.
5f. Now click on the mask of the Adjustment layer and paint as explained below.
5g. Repeat for Layer 2 [top layer].
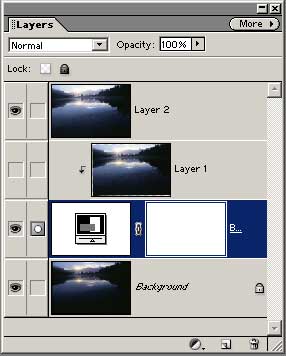
6. Select a soft brush with a low opacity say 40 to 50%. See the page on Adjustment layers [page 18] for more on this. Make it a largish size determined by how large your photograph is.
7. Pick the top layer with the burnt out areas and begin to gently paint with the black ink over the very bright parts. Gradually the areas can be burnt in.
8. Repeat for the middle layer. The result can be seen on the below.
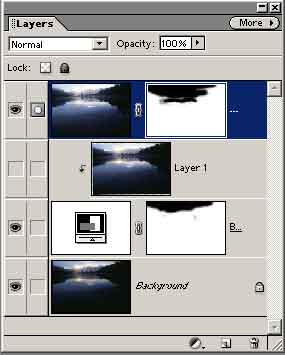
9. In this case there were very dark areas of tree at the left and right sides. By making a rough lasso selection and feathering this a Levels Adjustment Layer was made and these areas were lightened to the limit. This limit was how much green noise one could tolerate. Then the Opacity of this layer could be reduced to perfection.
10. Similarly the bottom of the picture is too dark and so a selection was made and a Levels Adjustment Layer was made. The reason for another layer was that the feathering was greater. But just by using the brush on the Levels Layer Mask the setting used in para. 9 could be reproduced by stealth i.e. changing the Opacity of the brush.
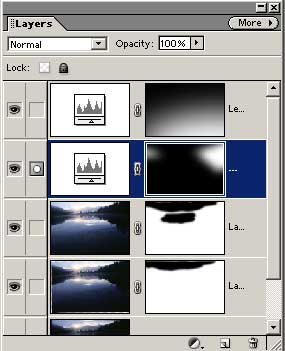
11. All you need do now is to Flatten the image and save as a print file.
| BEFORE | 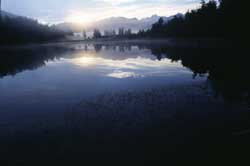 |
AFTER | 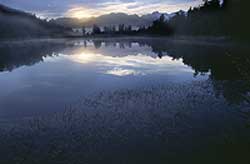 |
You can see that the sky is the same in both versions but now there is more detail in the dark areas.
As an addition I have found a Free HDR Program that seems very satisfactory. It can be downloaded as a portable program so that there is no need to install it. It will run straightaway. It is called Fusion and can be downloadedm from http://fusion-hdr.com.
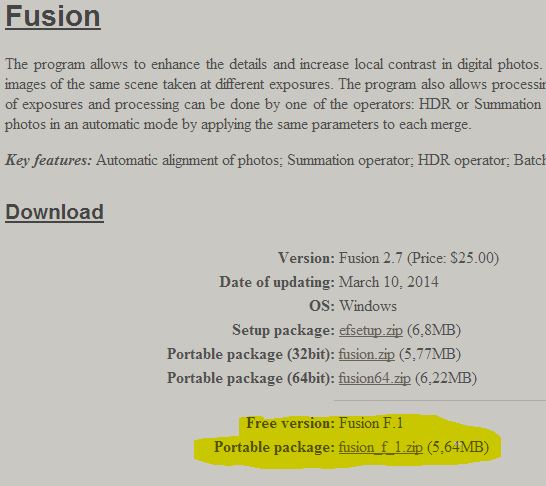
The Portable versions are highlighted. Usually nowadays the 64 bit version is the one to choose.
You will need to look towards the centre of the web page to find the link for the free version. It yielded the best result on the handheld test and produced very good results on the other tests. I obtained better results using the SUM operator rather than the HDR operator. Fusion's interface is a little dated, but I found the controls clearly labeled and the preview responsive and accurate though small. When using the SUM operator, I did have problems with halos around areas of transition from light to dark. This is fixable by increasing the "smoothing" slider. The online documentation is minimal and the built-in help did not work - so you're kind of on your own here. Overall, I feel it gave good results with average work. Best for the photographer who wants to spend a little more time with the image. Luminance supports all major incoming file formats including RAW; but unfortunately only saves in JPG.
Those who use a MAC can download another HDR program called HDRist from http://www.ohanaware.com/hdrtist/ This is free and only works on a MAC so I have not been able to test it out.