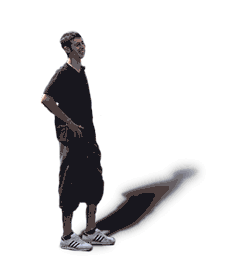
Often there is the need to add someone or something extra to a group photograph or to give an empty scene life. So yo may wish to put two people in a photo of a avenue of trees or a few cows or sheep into an empty field. Whatever item you want to add it is best to add shadow details otherwise the added item appears to float and the scene looks far from realistic.
Other reasons why an object inserted into a picture looking unreal is because they are too sharp or the wrong scale. These are matters that are easily put right. Just be aware that you must look at the final result before showing it to the wider world.
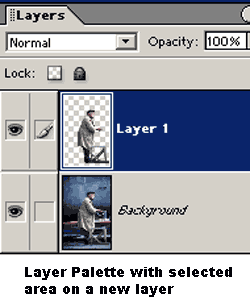
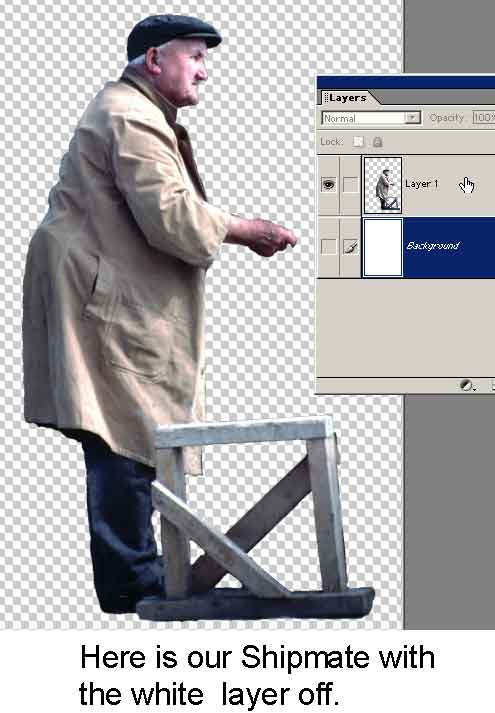
Ground shadows are the easiest to make in Photoshop and we shall stick to these here. First you must locate a suitable figure that you wish to use. They will be part of an existing photo and so the first task is to select the item. Using the Brush Selector tool is a quick and easy way to do this. It automatically feathers the edge according to the brush size used at every part of the edge. This means that you can have an edge with variable feathering. Having made a selection put it on to another layer by itself. Do this by using Layer via Copy found under the Layer menu then New shown here with our shipmate.
It is a good idea to check how well you have made the selection by switching off the background layer so that the new selection can be seen against a white sheet. Make any corrections now.
Also it is a good idea to save this layer onto a new sheet and then save this as a new file. Do this by pressing Ctrl+N and choosing a sheet of a suitable size. Then from the Layer Palette of the original photo click on the selection and drag this across to the new sheet. Centre it on the page and save it with the white background. Here the white layer is switched off.
Now let us start to make shadows.
1. Open up your selected image.
2. Duplicate your file from Image > Duplicate and close the original file.
3. Now duplicate the top layer by dragging this over the new layer icon on the Layers Palette.
4. Click on the / key to lock the Transparency and fill the layer with black by pressing Alt + Backspace [assuming the foreground is black].
5. Now press / again to remove the lock on the Transparency.
6. Drag the black top layer under Layer 1.
7. Press Ctrl + T to get to Free Transform. Right click on the image and select Distort from the menu.
8. Click on the box at top middle and drag out and down until the shadow is at the right angle by eye. As shown here.

9. You now need to paint out any errors that occur around the feet say. Here we just starting to paint with white paint the extra shadow not required.
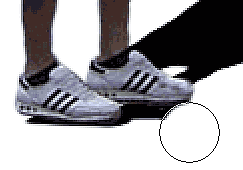
10. The shadow needs to be softened to look real. So we use Gaussian Blur of about a radius of 2.0 on this layer.
11. Since shadows get more blurred the further away it is, we now need to have a graded blurring. We can achieve this using the Quick Mask and the Gradient Tool as explained in the Montage instructions. For those who do not have the Quick Mask the following works just as well.
12. Pick the Polygonal Lasso and make a bold diagonal line across the shadow and then continue with the Lasso round the end of the shadow.
13. Feather this by as much as possible, say, 150 pixels.

14. Use Gaussian Blur at about 8.
15. Press Ctrl+D to remove the selection.
16. To make the shadow fade away in a realistic fashion we can simply use the Eraser. This is risky in that it is destructive. If you use the Eraser then use a large very soft size eraser brush and also a very low Opacity of about 5%. Then very gently brush away the shadow until it fades nicely.
17. However, it is better to use a non-destructive method. This needs the Layer Mask and this can be obtained from Grants Tools. The Elemask as discussed in the High Dynamic Range Photography will not work properly.
18. Click on the Layer Mask and then select the Gradient Tool.
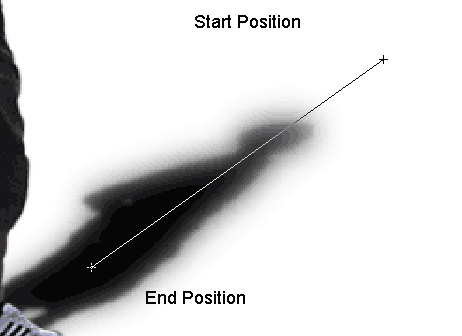
19. Ensure the Gradient tool is set to Foreground to Transparent and with Black as the Foreground colour.
20. Now make a stroke from the top of the shadow to the bottom. And there it is.
21. Link the top two layers. This enables the white background layer to be switched and the figure and the shadow moved as one item onto another photograph. It also enables you to alter the angle of the shadow to accommodate the direction of the light on the receiving image later on.
Two examples are shown here