
Ipiccy
What have we got left to explore in iPiccy Editor? Frames, Textures and Save. These are the obvious ones since they are on the top row of icons. But there is also the Designer section accessed via the Orange Arrow.
Some of these items are self explanatory but all need aspects to be explained.
25. Frames. And Holidays!
You need an image that is already opened for this to work. Having clicked on the Frame icon a new menu appears on the left side. You will see that there are only four Frames available. The rest of the menu add more effects to an image. The Holidays section are special frames that could be used around the Christmas period.
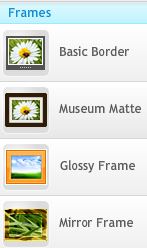
25.1 Basic border. Click this and controls are as shown. If you want a Caption below your image then this is the only frame to do this.
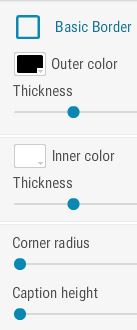
Change the widths of inner & outer frames to suit. Change the colours by clicking on the small rectangles. The default colours are black and white.
The Corner radius is useful and very hard to do in Photoshop or Gimp.
The Caption height is easily controlled. To add Text you need to go back to Blender.
25.2 Museum Matte. Similar to the Basic Border but with less controls.
25.3 Glossy Frame. As you will see there is a plethora of tweaks here. Not all are useful such as Decor and Glossy but the Shadows are good. This latter is not available in the Basic Border.
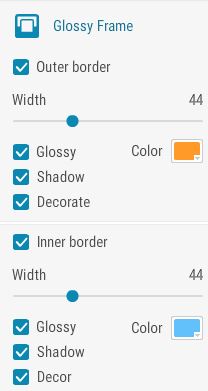
25.4 Mirror Frame. Really a misnomer since what you get is a coloured blurred version around you image. Note that the Shadow control puts a nice vignette round the inner image. The Polish control actually blurs the outer image.
25.5 Vignette & Matte. As 14.e. The controls work very well in both these frames.
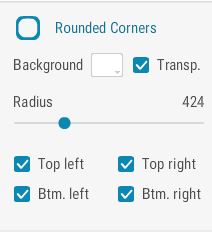
25.6 Rounded Corners. A curious control. Note that if Transp. Is ticked then the Background colour is not visible. The four blue ticks switch on and off the outside corners. This will give your final result a special shape.
25.7 Reflection. This is yet another brilliantly designed control. This is not easy to do in Photoshop or Gimp. Just try it out on a suitable image.
25.8 Drop Shadow. This adds a dark shadow. The colour of the shadow can be changed to any colour by
clicking on the small square initially grey. Note if Background is coloured this colour will be unseen if the Transparent box is ticked.
There are controls to move and shape the shadow.
25.9 Holidays - Snowflakes.
This adds a sort of frame of snowflakes around the image. The size can be changed. The Coldness puts a blue tint across the image only. Note the Brush control lets you remove the effect where required. Including the snowy frame.
25.10 Green Frame has 4 varieties of greenery to surround the image. Again there is a brush to erase the frame where needed. Note that this erasure remains even if you changes any of the controls.
25.11 Ornament Frame has a brush tool again to erase parts of the border. The curious thing here is the Set One Colour. It enables the bauble frame to be a single colour. Quite why I do not know.
25.12 Snow works very well. The snow effect looks quite real. This has an odd part. Look at how the Blend Mode works. It has the effect of removing the snow effect, the Coldness and the Border almost but not totally. The Brush tool works as before.
26. Textures is the next section.
As an aside the word texture* and text and toilet are linked in origin!
* Derivation of the word Texture https://ewonago.wordpress.com/tag/etymology-of-texture/
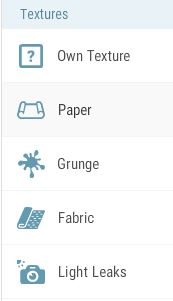
26.1 The top of the menu list is shown here and it begins with an item [Own Texture] that is interesting and requires significant input from you. Since you have not added any textures yet you need to press he Upload Textures button. You will need to find a suitable image on your computer. As soon as you click on it it will be placed over your currently open image. Any colour in the texture image can be neutralised by ticking the Ignore Texture Colour.
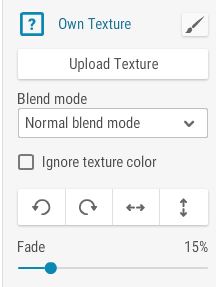
You can also flip and fade the texture.
Do not forget to try the various Blend Modes. The default one is Multiply.
The Brush tool lets you clear the texture from important parts of the image if necessary.
The rest of the menu will give you ideas of the sort of images that you could use for your own textures.
26.2 Paper is a case in point. This gives you 6 possible images including some text. You may find that although the text idea is good but may not suit exactly your image. So you could easily take a photo from a book or a newspaper to personalise you texture layer. The dialogue box is much the same as for 26.1.
26.3 Grunge to Misc all sven work the same as Paper.
This is a good range of textures and as you can tell you can easily personalise them.
27. Save.
This is the last section and you will already have used it by now.
Normally you will use the My Computer tab as shown here. The name in the File Name box can be left as it is because the name can be changed later having clicked on the Save to my computer button.
The File format box lets you save in JPG or PNG format. Observe that on the PNG format the words Transparency, best quality is used . This sort of format is lossless unlike JPG which throws away image data when saving. It can also be transparent in the fact that there can be no background. This explained well on https://www.techsmith.com/blog/jpg-vs-png/
Whichever format you choose the clicking on the Save to my computer button will open up your computer files for you to decide where to save the masterpiece you have just made.