
Ipiccy
Open the iPiccy program using http://ipiccy.com/ and you will be confronted with screen below.

Mac Users please read the Note at the bottom of this page.
Of the three Blue boxes we shall only use Edit a Photo now. Click on this and you will be confronted with a blank screen with controls that let you select a picture to process from various sources. See below.

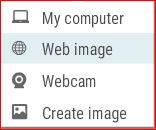
1. To start click on OPEN. Then on next screen click on
My Computer to find an image already on your computer.
There are two out-dated YouTube videos of mine describing how to start iPiccy HERE
2. Click on the chosen image and it will open and fill the frame nicely. Notice that you can ZOOM in and out using the Thumb Wheel on your Mouse. If you do not have this then click on the slider control at the bottom right of the screen. A slider control jumps has a 1 to 1 [full size] and Fill Screen buttons. Nice to use.

One more thing to learn is the method of finding your way about a much enlarged photo. If you enlarge to more than filling the screen then a tiny replica of the whole image is shown at bottom right. It will have a red rectangle on it showing the part of the image on the screen. Put you mouse cursor on the rectangle then click and drag. You will reveal other areas of the image. Fine tuning the image position is done on the image itself.
3. On the left side are the controls for the Basic Editor. The first you see are shown on the below..

4. You can try any of these controls to check what they do without committing yourself. So try Auto Fix and see the change. If you like this then click the OK button. If not click Cancel. This applies to all the controls below. Here also is a Fade slider that allows you to reduce this effect.
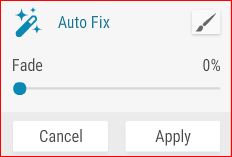
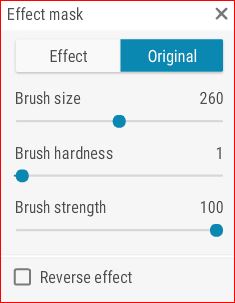
4a. Additionally notice the Paint Brush icon. Clicking this show you the Effect Mask controls. This is a very powerful method of improving your images. With this you can
paint away an effect and having done this Reverse the effect. When you have used this
program and become proficient you will just how useful this is. This system is used
throughout iPiccy
5. Run through the controls until you are happy with the result. The controls we would recommend as the most useful are Auto Fix, Resize Image, Crop Picture, Rotate and Flip, Curves and Levels. Some of these will need a bit more explanation.

Please note that at the top of the screen are these controls. These give access to your Photo Library, Open a new image,a bent arrow to Undo the last operation and Save your result.

Also observe at the top left side of the screen is this small icon. If you click and hold this you can see the Before and After situation for your image.
One other thing of note is found at the bottom left of the screen. As seen below. The Light Bulb enables you to have a Dark Mode screen version that you may prefer.
The next Icon enables you to show iPiccy Full Screen. This is a wonderful idea. But it seems to affect some controls such a changing the values manually in Resize Image. The sliders work but you are not able to highlight the dimensions and type in a new size. The sliders are a bit twitchy to get correct.
The ? gets you to the Help modes. This can also be found by clicking on your name at the top right of the screen [assuming you have signed in]. Here you can also check your Account [if you wish to modify it] and Log Out of iPiccy..

6. Crop Picture. Here grab any of the little boxes and drag to the shape you require. Notice the lines on the image. The crossing points indicate the strong points of interest in an image. So try to crop so that the important parts of the image are near these crossings for maximum picture impact. These are known as the THIRDS. Notice also the Constrain proportions control is available.
7. Resize Image. The important thing here is to ensure that the Constrain proportions is ticked unless you really want to distort your image. The size is in Pixels . These are the Picture Elements that every image is made of.
8. Rotate and Flip. This is also used to Straighten an image. Seas and oceans horizons must be level.
9. Curves. This is a wonderful control. Upon opening it you will see the box below. If you have not signed in to iPiccy then Apply will read Sign In. Signing In will let you use and Apply Curves and other controls.

The diagonal line can be dragged using the left mouse key. You can click on any part of the line and you are not limited to just one point as you see here. This will produce wild effects. Some parts of you image could be negative whilst the rest positive.

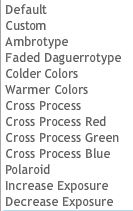
Additionally the drop down box labelled Default has a large number of effects or presets already. This is very handy.
Notice the Brush icon at the top right. Click on this and another box appears.
This allows you to control things. For instance the Erase with a Brush size of 277, Hardness of 0 and Strength of 10% will let you paint over the image and gently remove the Curves effect from just where you wish. Paint several times to increase the result.
10. Levels. Here is another control that can be used to change the Brightness and Contrast of an image. This is better to use than the Exposure control because it is easier not to blank out the highlights or block the shadows. You can change the Red, Green and Blue channels independently as well. This can be used for removing colour bias.
Notice the Brush icon that works the same way as for the Curves version. And note the Fade control. Using this allows you to reduce the effect from the Levels,. Fade is found on many other controls.
11. Having committed to one or more of these controls it is time to move to the next category of image manipulation. There are 6 others spread vertically along the left of the workspace as shown here. We shall look at each of these in turn from the left. These words appear if you hover the mouse over an icon. NOTE that clicking on the Orange Arrow allows you to got to Collage and Designer.
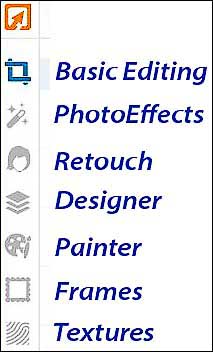
12. We have just been using the Basic Edit indicated by the Crossed L Shapes icon. So now let us move on to the Wand or Photo Effects.
Note for Mac users. iPiccy will work perfectly for you. Just take note of what iPiccy say on https://ipiccy.com/help/flash-safari
Enable Image Storage video describes the enabling of this control that allows you to keep photos ready for use in iPiccy. This is needed for Collage for instance.
Note for Mac users see this page to Enable Image Storage.