
Daliesque
I have been fascinated by Salvador Dali for a long time and now Photoshop has given me a chance to produce images of a similar slant but with my own touch.
The techniques for doing this can be broken down into several parts and I needed to master these to make a stab at my own surreal work. These are 1) use of Liquify tool 2) being able to fold an image using the Transform tool 3) extracting images to place into a suitable scene and 4) finding suitable items and people to photograph to be able to do 3).
One could argue that a fifth technique is to be able to devise a suitable set of items to include to make a sensible image overall. That is the final result should have meaning. Does this matter? Did Dali’s paintings all have meaning? Consider The Persistance of Memory 1931 and Sleep 1937 for instance.
From Wikipedia Dawn Ades wrote, "The soft watches are an unconscious symbol of the relativity of space and time, a Surrealist meditation on the collapse of our notions of a fixed cosmic order". This interpretation suggests that Dalí was incorporating an understanding of the world introduced by Albert Einstein's Special Theory of Relativity. Asked whether this was in fact the case, Dalí replied that the soft watches were not inspired by the theory of relativity, but by the surrealist perception of a Camembert cheese melting in the sun. The orange clock at the bottom left of the painting is covered in ants. Dalí often used ants in his paintings as a symbol for death.
 All is Decay - my first attempt
 Alice in Wonder - my second try
Above are examples of recent attempts to make a decent surreal image.
These have both used a background that is clear of any distracting elements and a wide openness. If you choose a closer scene then one can play with the scale of objects placed on this background.
1. Liquify
This was discussed two sessions ago and the same ideas can be used here.
2. Folding
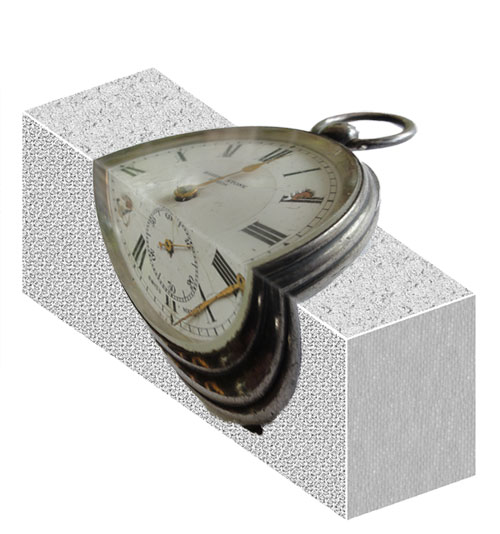
a. Take a quick photo of a clock or watch and download to your computer into a folder for Surreal objects.
b. Open this in any version of Photoshop.
c. Open a background scene preferably with a table on it.
d. Drag the watch/clock onto the table and re-size using Transform.
e. Select the body of the watch and deform it to an oval using Ctrl + T and dragging on one of the boxes.
f. Press Enter and then Ctrl + D to deselect.
g. Using the Polygonal Lasso tool setting the Feather Radius to 4 select the bottom half from the edge of the
table downwards.
h. Press Ctrl + T and Right click within the selection. Select Distort.
i. Using the Corner Handles deform the bottom half of the watch until it hangs convincingly over the edge.
j. Press Enter and then Ctrl + D to deselect.
k. If necessary use the Clone tool or Eraser to tidy up.
It may take a few attempts to get the edges to line correctly. So keep trying. There is a knack
Bending
This is to fold the watch right over in a dramatic way. This process requires two pictures of a watch or clock.
The front and back views. Having taken the photos and got them into your computer open them in Pho-
toshop and extract them onto a new document with a transparent background. In PSE 11 this is easily
achieved by going to Image > Magic Extractor.
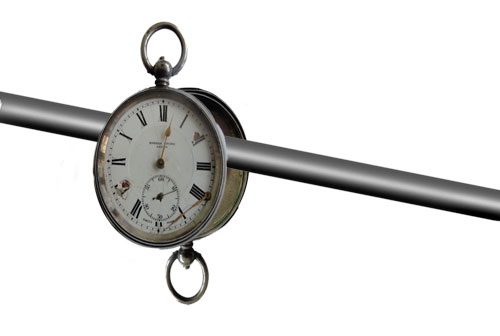
1. Find a scene with, say, a dead tree with a branch with sort of horizontal branch to hang the bent device. Above you see I used a pipe for demonstration.
2. Using the Move tool drag each view of the watch or clock onto the scene.
3. Re-size using the Transform tool. To ensure that both watches end up the same size insert, say, 20% in the boxes in the Options bar.
4. Put the rear view of the watch layer below the tree branch [assuming you have moves the tree image onto the background] so that it appears behind the branch as seen above.
5. Using Transform again elongate both watch views into an oval and shift them as shown above. That is not coincident. Deselect the watches.
6. Position the watches so that they are about halfway above the branch again as shown above.
7. Using the Lasso with feathering of 1 pixel draw a selection across the face of the front watch and round to enclose the top part. Try to draw the path across the face of the front watch to follow roughly the branch but above it.
8. In the Layers Palette pick the front watch and press the Delete key.
9. Now pick the back watch and press Delete. The tops of the watches should now have diappeared. Click once to deselect.
10. In the Layers Palette pick the front watch and use the Rectangular Marquee to select this watch.
11. From the Filter Menu go to Distort > Liquify and using the Twirl and Warp tools shape the watch.
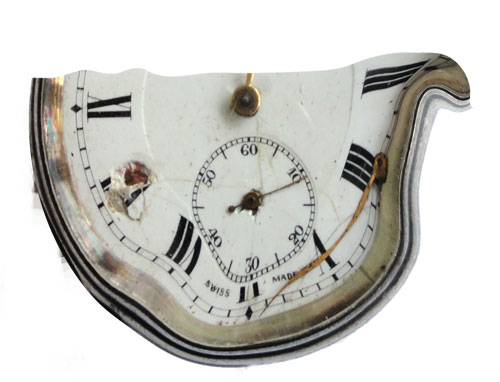
12. Click OK then select the Smudge tool [with the Blur and Sharpen tools]. From the Options bar pick a smallish brush that is hard. Smudge the two halves together until they join convincingly.
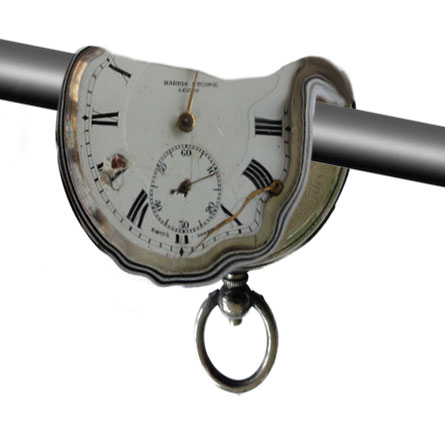
So here we have three methods to make parts of a surreal image from simple ingredients. This will allow your imagination to take wing and soar to undreamed of heights. Give it a try. You will never know until you do so.