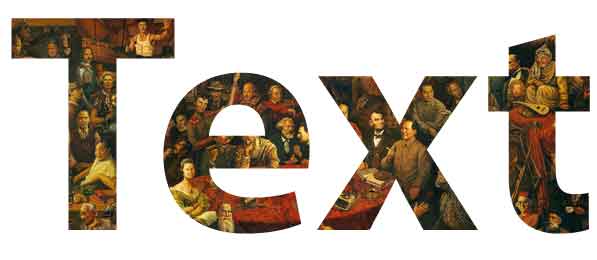
Thanks to our star pupil here is a much simpler way to put images into text or indeed any other shape you care to make. Please see previous methods for comparison on page 36
This method does require a knowledge of layers and clipping. These are explained below.
1. Open a new image by going to File > New. Choose a suitable size and a white background.
2. Pick the Text tool from the toolbox. Ensure that you choose the Horizontal text tool.
3. Select a suitable font that can make wide bold letters such as Myriad Pro Bold. Font size to be large.
4. Type in your text then press Ctrl + T to obtain the bounding box. Elements also selects the Move tool. This allows you to enlarge the text to the size you want. Click the tick when done.

Example with black line to show the edge.
5. Now open an image file that you want to be incorporated into the text.
6. Using the Move tool drag this on top of the text layer. Close the image file.
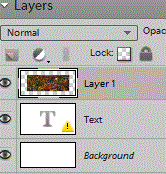
This is the layers palette at this stage.
7. We suggest that you Maximise the text plus image file and the using Ctrl + T re-size the image file so that it covers the letters of your text.
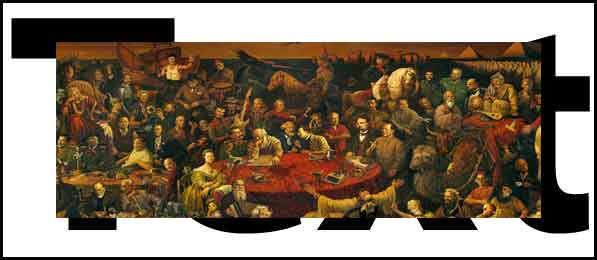
Here the image does not cover the text. Correct this as described above.
8. Go to the Menu bar and Layer > Group with Previous or Ctrl + G. The layers palette is then like the one below.
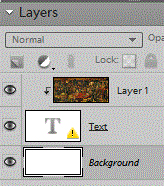
9. Bingo. It is done. You can now using the Move tool move the image around for the best fit.
10. Here is the final result without the stroked black line to show the edge as in examples above. The image included shows luminaries as Shakespeare, Yasser Arafat, Lincoln and Mao Zedong and our own dear Queen.