1

Fill Text with Images

You can fill text with an image in two ways:

The process you use to fill the text varies for these two results. In this lesson, we will fill single characters in a word with different images.

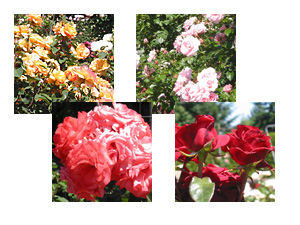
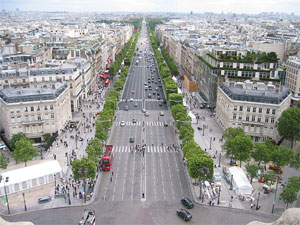
Example Images Used for Fill
Example Images used in text fill

To fill single characters in a word with different images:

  1. Press D to set the foreground and background colors to the default colors of black foreground and white background.
  2. Open a new file and fill the background with white.
  3. From the toolbar, select the Horizontal Type tool and enter your text in black. Choose a font that has wide thick characters so that your image will show through clearly. A type layer is created above the background layer.
  4. With the type layer selected, press Ctrl+T to display the transform bounding box:
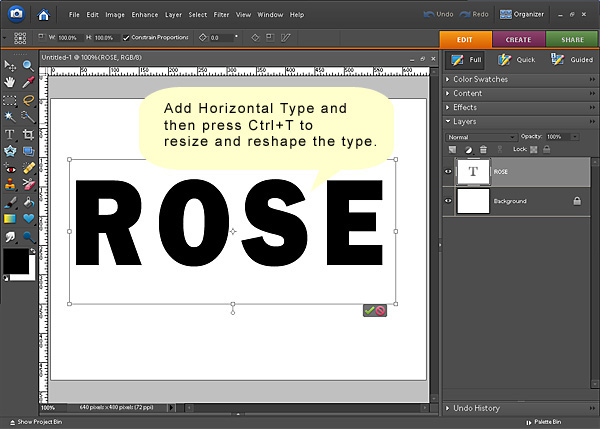
    1. Drag the handles on the transform box to resize and reshape your text as needed.
    2. Click Commit (the green checkmark) to commit your changes.

    Transform the text

  5. In the Layers palette, right-click on the text layer to display the pop-up menu. Select Simplify Layer. Simplifying the text layer changes it from a vector layer to a raster layer, and the text is no longer editable. Make sure that the text is in its final form before simplifying.
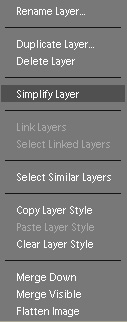
    Simplify the text layer

  6. Using the Magic Wand tool, select a single character. Make sure that Contiguous is selected on the options bar for the Magic Wand tool.
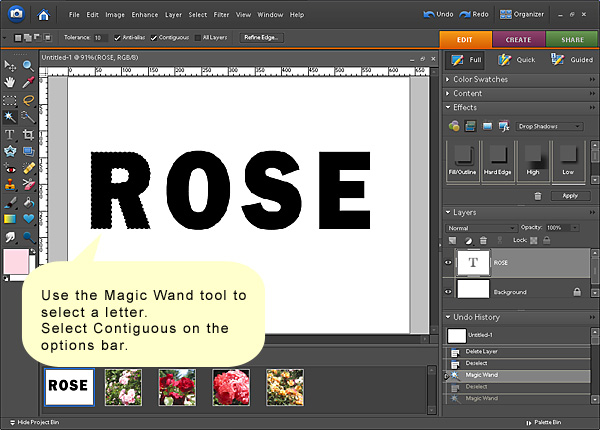
    Select a single character
  7. Copy and paste the image you want to use into the selection:

    1. Open the image you want to use.
    2. From the Select menu, select Select All or select a portion of the image to copy.
    3. From the Edit menu, select Copy.
    4. Open or shift focus to the image that contains the selected text character.
    5. From the Edit menu, select Paste Into Selection. The image is copied into the selection.

    Copy an image into a character

  8. Press Ctrl+T to resize and reposition the image in the text character:

    1. Grab a handle on the transform box and resize the image as needed. If you cannot see the handles, from the View menu, select Fit on Screen and the entire transform box will be displayed.
    2. Click Commit (the green checkbox).
  9. Repeat steps 6-8 for each character.
  10. Optionally, add special effects such as bevels and drop shadows to the text layer.

    Fill a line or paragraph of text with a single image

    The process you use to fill the text varies for these two results. In this lesson, we will fill a line of text with a single image.

    Example Picture Used for Fill
    Example of Filled Text Image used for fill

    To fill a line of text with an image:

    1. Press D to set the foreground and background colors to the default colors of black foreground and white background.
    2. Open a new file and fill the background with white.
    3. From the toolbar, select the Horizontal Type tool and enter your text in black. Choose a font that has wide thick characters so that your image will show through clearly. A type layer is created above the background layer.
    4. With the type layer selected, press Ctrl+T to display the transform bounding box:
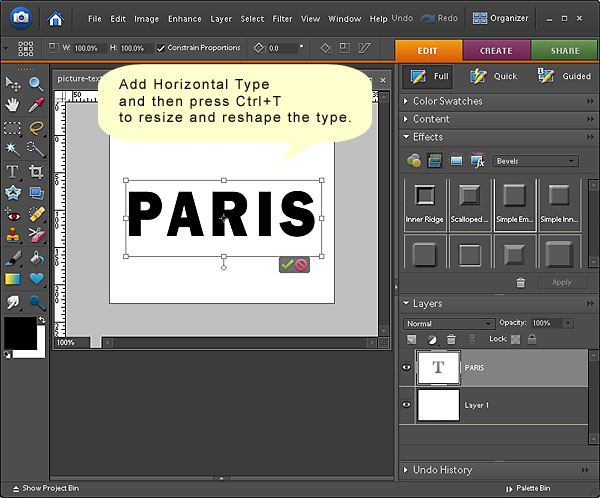
      1. Drag the handles on the transform box to resize and reshape your text as needed.
      2. Click Commit (the green checkmark) to commit your changes.

      Transform text

    5. In the Layers palette, click the Create New Layer icon to create a new blank layer above the type layer.
    6. To place the image you want to show in the text, from the File menu, select Place:

      1. In the Place dialogue, navigate to the folder and file you want to use.
      2. Click Place. The image is opened in the new layer and is displayed in a bounding box that you can resize.
      3. Grab a handle on the bounding box and resize the image as needed. From the View menu, select Fit on Screen to see any hidden handles if necessary.
      4. Click Commit (the green checkbox). The image should completely cover the text on the layer below.

      Note: The Place command is really useful if you want to use an image that is much larger in dimension or a different resolution than the one that contains the text. When you place an image, Photoshop Elements automatically converts the image to the correct resolution and size you want.

    7. Select the image layer and press Ctrl+G to create a clipping group with the text layer below. The picture now appears within the text.
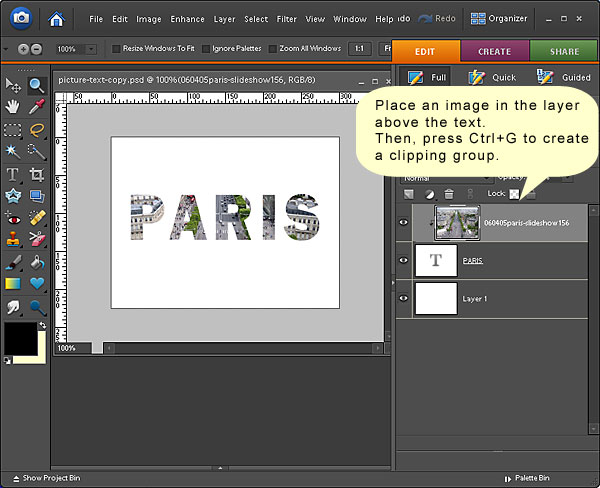
      Create a clipping group

    Versatile Editing

    Because the image layer and the text layer are separate, you can make changes to the text layer and more or less of the image will displayed. You can also use the Move tool to move the picture so that a different view is displayed within the text. For example:

    Filled Text Postcard

    To create the postcard shown in this lesson:

    1. Create the filled text as described above.
    2. Use the Effects palette to add a bevel and drop shadow to the text.
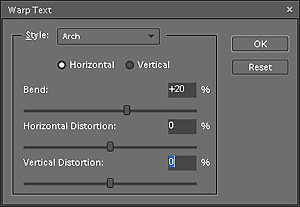
    3. Use the Create Warped Text option on the Type Tool options bar to warp the text.
    4. In the Layers palette, add a new layer above the white background layer and below the text layer. Place a background image in the new layer.
    5. In the Layers palette, reduce the opacity of the background image layer as desired.
    6. Add text layers at the top of the layer stack. Enter text in a different font to complement the picture text.
    7. Apply special effects to the text layers as desired. In this example, an inner glow and a drop shadow were added.

    This project is derived from http://www.alibony.com/pse/080108char-fill.html and http://www.alibony.com/pse/073108text-fill.html

    We thank them for the use of their ideas.

    To page 37
    HOME
    DIGITAL INDEX