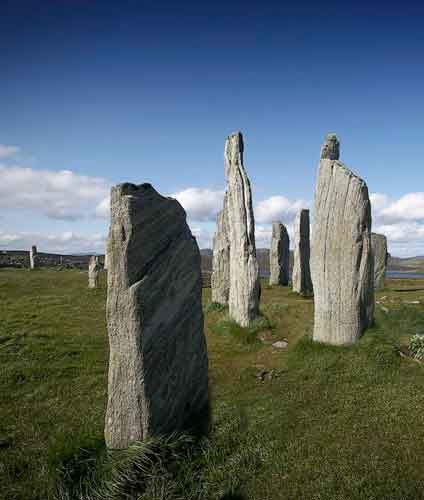
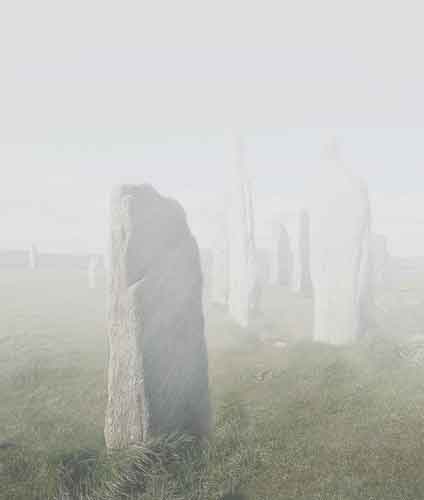
It is a sad fact that sometimes we are too late or unfortunate when we take a landscape photograph
in
that the mist we expected or wanted is not there. So we have missed the magical moments. Alternatively
you may not have thought about this possibility until later. Fear not Photoshop can help. Any variety
will
do.
Choose an image to try out this idea that has a strong foreground that will give a feeling of depth.
1. Open a suitable image.
2. Click on the Adjustment Layer icon (half black / half white circle).
3. Select the Levels control.
4. Drag the Black OUTPUT triangle to the right to get a reading of 220. Click OK.
5. It is now very pale and washed out. Panic not. We clear the mist in selected areas.
6. Make the Foreground Black by clicking on D and then X on the keyboard.
7. From the Tool Box pick the Gradient Tool [G].
8. In the Options bar make sure the following items are set as written going from left to right..
9. Gradient is set to Foreground to Transparent from the drop down list [press small triangle]. Second
from left square.
10. Linear Gradient. The first option.
11. Mode = Normal. Opacity = 30%.
12. Reverse ticked. Dither ticked. Transparency ticked.
13. Hold down the Shift key and with the + cursor near the top of the image. Drag downwards and
release the left mouse key.
14. Repeat starting at a lower place on the image.
15. Continue this operation until the mist looks right.
16. There will be parts of the image that need to be less misty such as things in the foreground.
17. Select a Brush tool and with the Levels layer and its mask highlighted paint over these parts.
18. Remember to change the Opacity of the brush often to ensure a smooth transition.
19. The Opacity of the Adjustment layer can also be altered if needs be.
20. See the example below. Before is on the left and After is on the right.