
You can automatically convert multiple images to the same file format, or to the same size and resolution, using the Batch command. This is especially useful when importing images from a digital camera or scanner, or when processing images for use on the Web. And it is great fun watching it all happen so fast.
Note: If the plug-in module for your camera or scanner does not support importing multiple images, it may not work optimally during batch-processing. Contact the plug-in's manufacturer for further information. However XP can import a batch easily. These plug-ins automatically appear, with luck, at the drop down box.
To batch-process files using the Batch command:
1. Choose File > Batch Processing or Process Multiple Images in PSE 3 to 11. There are other differences mainly in where the items shown in bold below.

 For PSE11 note that the order of the Options is reversed but are the same otherwise.
2. For Files to Convert, specify which files you want to process:
* Folder to process files already stored on your computer. Click Source to locate and select the folder. Select Include All Sub folders to process files in sub folders.
* Import to import and process images from a PDF file, a digital camera, or a scanner. Select an import option from the From pop-up menu. The available options depend on which plug-in modules are installed on your computer.
* Opened Files to process all the open files.
* Note for success ensure that you do not mix vertical with horizontal images. If you have opened all the pictures you want to convert but some are vertical then by using Ctrl + Tab you can go through your images quickly. Stop at the vertical ones and then make them horizontal by going to Image > Rotate > 90 Deg left. Then continue through the batch in the same way.
3. For Conversion Options, choose the format to which you want to convert files. For more information about file formats see page 3 of our notes.
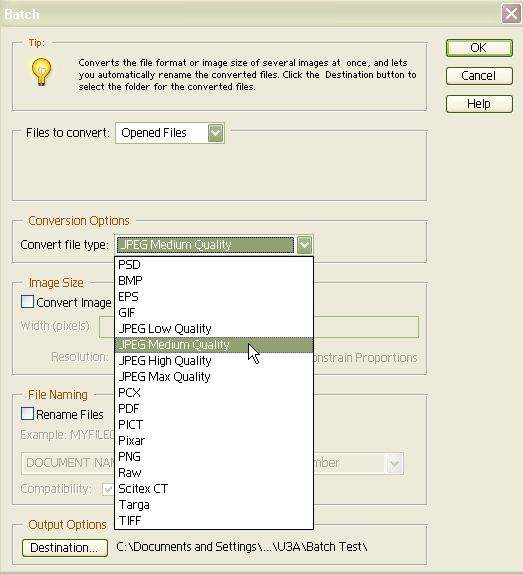
4. To change the size and/or resolution of processed images, select Convert Image Size.
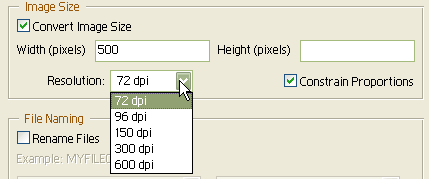
Then do one or both of the following:
* Specify the width and height of the processed images. To keep the aspect ratio (the ration of width to height) of the images the same, select Constrain Aspect Ratio. Then enter a value in either the Width text box or the Height text box. To change the aspect ratio of the images, deselect Constrain Aspect Ratio and enter values in both the Width and Height text boxes.
* Choose the resolution to which you want to convert the images from the Resolution pop-up menu.
5. To save modified versions of the files with new names (leaving the originals unchanged), select Rename Files and set naming options:

* Select items from the pop-up menus or enter text into the fields to be combined into the default names for all files. Elements include document name, serial number or letter, file creation date, and file extension. The fields let you change the order and formatting of the filename parts. You must include at least one field that is unique for every file (for example, filename, serial number, or serial letter) to prevent files from overwriting each other. DO NOT WRITE IN A NAME just accept one of the options in each of these two drop down boxes. Here we have chosen DOCUMENT NAME and the new file name will be the name it already has but in capitals, and 2 Digit Serial Number will add 01, 02 and so on. This will be followed by the extension letters such as .jpg or .tif according to file type picked in para 3.
* For File Name Compatibility, choose Windows, Mac OS, and UNIX to make filenames compatible with Windows, Mac OS, and UNIX operating systems.
6. Click Destination to locate and select a destination folder for the processed files.
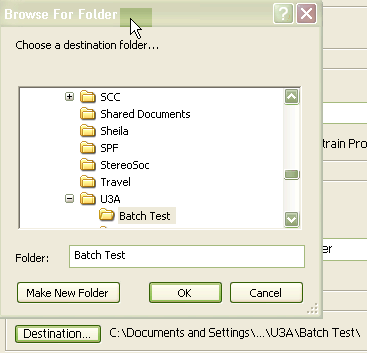
7. Click OK. And it all happens in front of you and the original pictures are succesively closed until the workspace is empty. To see your resulte then you have to open the new destination folder. You may now need to rotate the images that were vertical to make them rotate them vertical again. Resave these images.
8. If all else fails ring or e-mail us!