
The idea of this technique is to produce an image that could have been painted using pen & ink and a colour wash. It is an easy and simple idea that takes just a few minutes to do. It works best on images that have a lot of textures such as photographs of buildings.
So let us go.
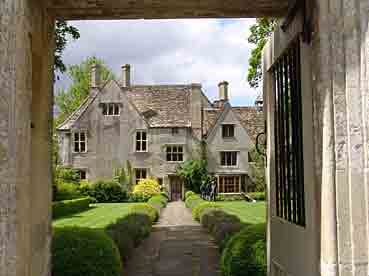
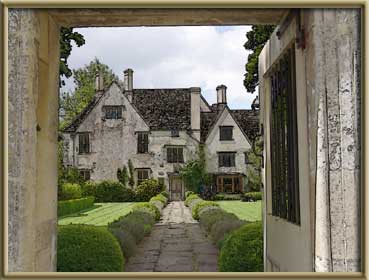
[1] Open your image and duplicate this using Image > Duplicate Image [PSE 2 or PS7] or File > Dupli cate Image PSE 3, 4 and PS CS]. We are using a picture of Avebury Manor House here.
[2] Set the longest side to 1500 pixels using the Image Size dialogue box. Ignore the Resolution setting.
[3] Duplicate the Background layer by dragging it over the New Layer icon at the bottom of the Layers palette.
[4] On the top layer click on the Eye Icon to remove it and highlight the bottom or Background layer [see the screen grab].
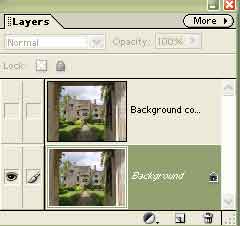
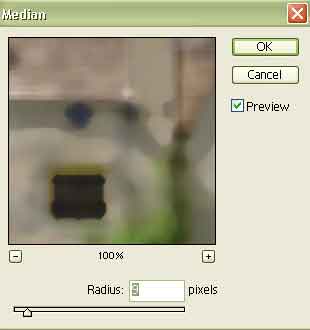
[5] We now soften this layer. There are
several ways to do this using various filters.
Try these out and see what happens in the
end. Underpainting, Sponge, Watercolour
or Waterpaper or Smudge Stick. However,
for this exercise we shall use the Median
filter. Find this filter under Filter > Noise >
Median. A setting of 5 to 10 is suitable as
shown on the right. This figure does depend
on your image size and this is why we have
chosen 1500 pixels as the maximum size.
Now highlight the top layer.
[6] Go to Filter > Stylize > Find Edges. It will work with no settings that you can change.
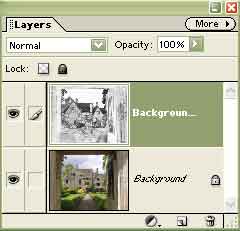
[7] Press Ctrl + Shift + U to convert this to black and white.
[8] Change the Blend mode from Normal [found at the top of the Layers Palette] to Multiply.
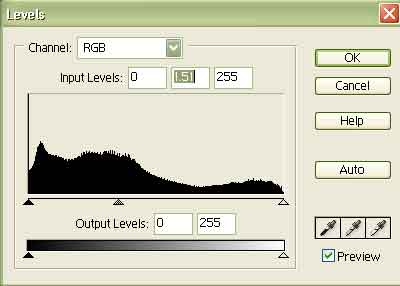
[9] The image at this stage is a bit dark so select an Adjustment Layer of Levels.
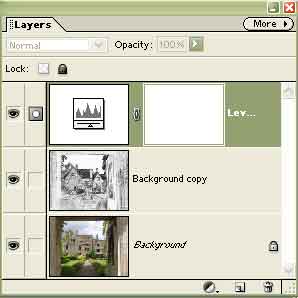
[10] Move the Middle slider to the left to brighten as needed.
[11] You can now Flatten the image if required and you can add a fancy border. We leave that to the reader.
[12] Have fun.