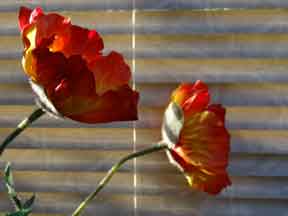
 Start Image
One of the joys of Photoshop and other Image processing programmes is the ability to use Blending Modes.
These are available when you have some layers in use. The layers can be blended in various ways with each
other. On the picture of the Layer Palette on page 14 you will see at the top a section with the words Soft
Light therein. This is where you will find all the Blending modes.
As an example load up an image with a bold graphic content. Then make its size, using Image > Image Size, 4 inches (10 cm) long on its longest side {i.e. If it is a horizontal image this side will 4 in}. Set the resolution to, say, 72 px/in.
Now make three new layers. The easy way to do this is to drag the background over the New Layer icon at the bottom of the Layers Palette [or for PS 5, 6 ,7, 8 & 9 press Ctrl +J keys] thrice. Make visible the Layers Palette and you should see 3 layers each with an image identical to the background. Now click the EYE symbol on the left of the palette on the top two layers [2 & 3] so that the eye is off. Now click in the layer 1 strip so that this layer is highlighted. You are now looking at this layer and the other two are switched off temporarily.
Select Filter from the menu bar. In the drop down menu pick Artistic whence you will see yet another drop
down menu. Select from here Dry Brush. There are options for this filter. A good setting is Brush size =
2, detail = 8, texture = 1. Press OK.
Now go to layer 2. From the top menu pick Filter and from this pick Blur > Gaussian Blur. Set this to
about 6. Press OK. Now go to Hue & Saturation via the top menu bar Enhance > Colour for Elements or
Image > Adjust for Photoshop. Set the Saturation to +50. Press OK.
Now go to layer 3. From the top menu pick Filter and from this pick Blur > Smart Blur. From the options
pick Mode > Edge Only. Also radius = 13 and Threshold = 30. This gives white outlines on black. Press
OK. Now go to Image > Adjust > Invert or press Ctrl +I. This gives black lines on white.
At this point you will start to use the Blending Modes. Whilst the Layer 3 is selected in the mode window
click the small triangle. A drop down menu appears. You can try any of these but for now choose Soft
Light. Go to layer 2 so that it is highlighted. Again pick soft light.
If satisfied with your results then you can flatten all the layers. This done by clicking the triangle at the very
top of the Layers Palette. At the bottom of the menu that appears should be Flatten. Also there is merge
visible. Since all the EYES are presently selected then this control could be used as well. If you only
wanted to flatten some of the layers then switch off those you want to keep separate. Press Flatten now.
And SAVE the result. You might want to Sharpen you image at this point before printing.
Start Image
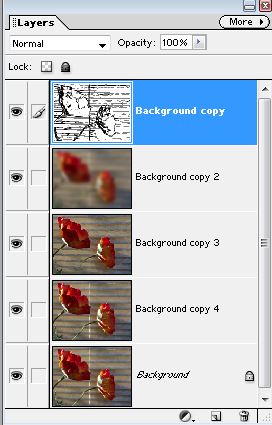 The Layer Stack
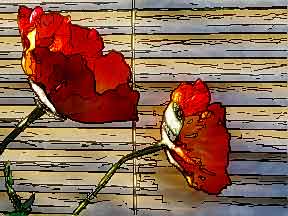 The Final Result
To Page 9 - Rules of Thumb
HOME
DIGITAL INDEX